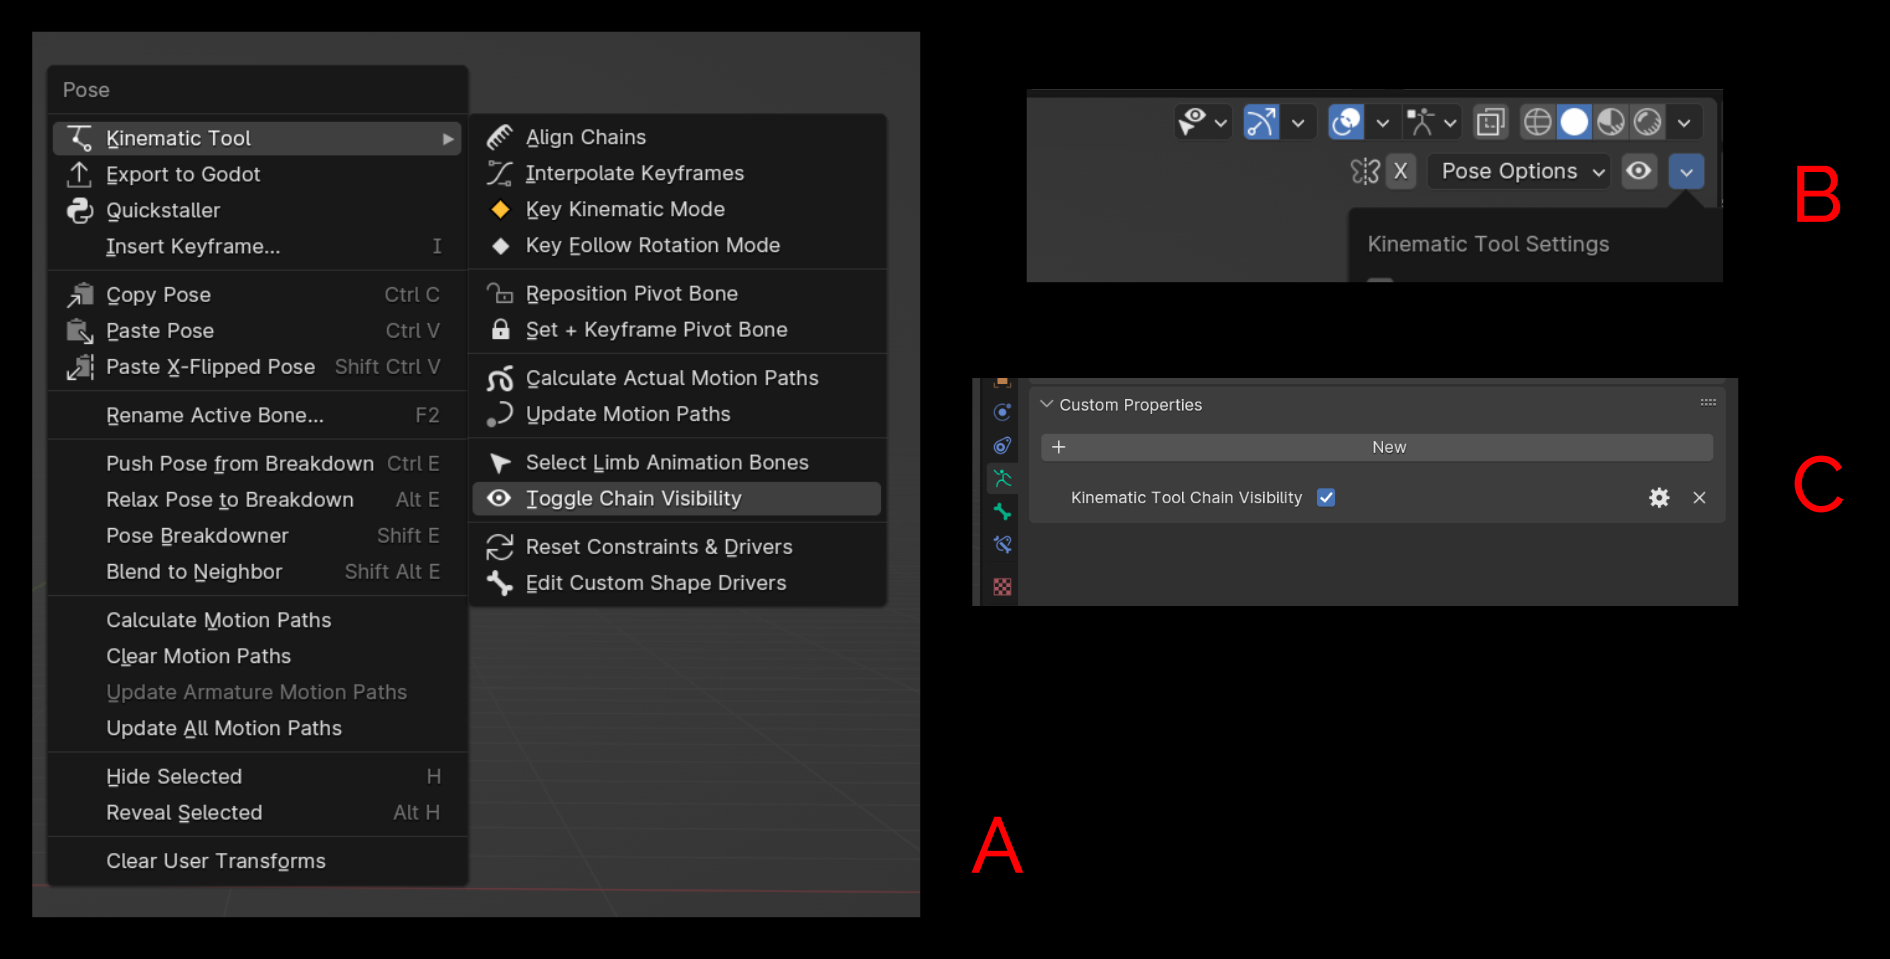
[B] Only the active kinematic chains are visible (but not hidden!)
Introduction
Installation
Pre-Rigged Models
Rigging
Contact
Animation
IK Ranges
Aligning Chains
Chain Visibility
Pivoting
Motion Paths
Automatic Features
Follow Rotation
System
One of the advantages of using the Kinematic Tool is a cleaner animation workspace. With conventional systems, we're often left with dangling inactive kinematic chains that clutter the viewport and catch selection clicks. With the Kinematic Tool that's no longer a problem because you're able to toggle the visibility of inactive kinematic chains. The visibility also responds in real time as the chains move from inactive to active and back and forth. Let's look at how this system works as well as the benefits it offers to working with keyframe data in the action editor.
You can toggle the visibility system by using the "Toggle Chain Visibility" operator. This will flip on or off the values inside the drivers that control the chain visibility system and allow you to access the animation bones of both the IK and FK chains, whether or not they are active.
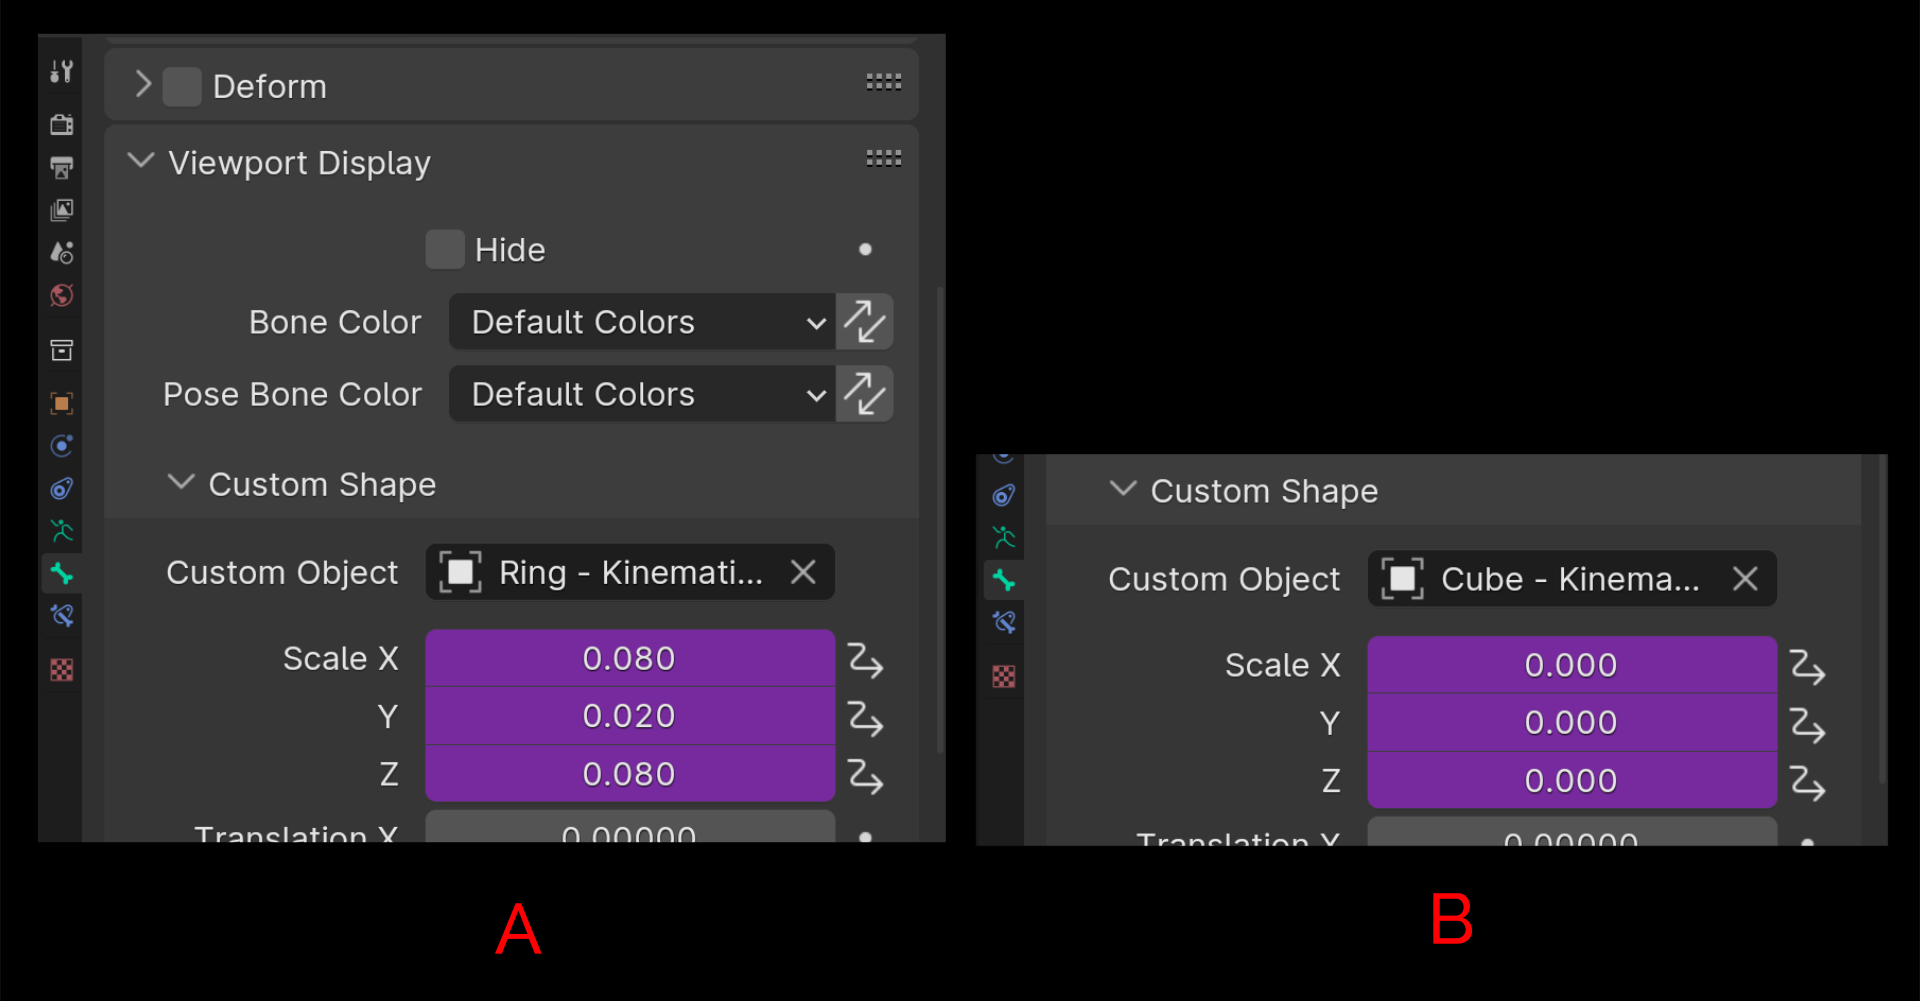
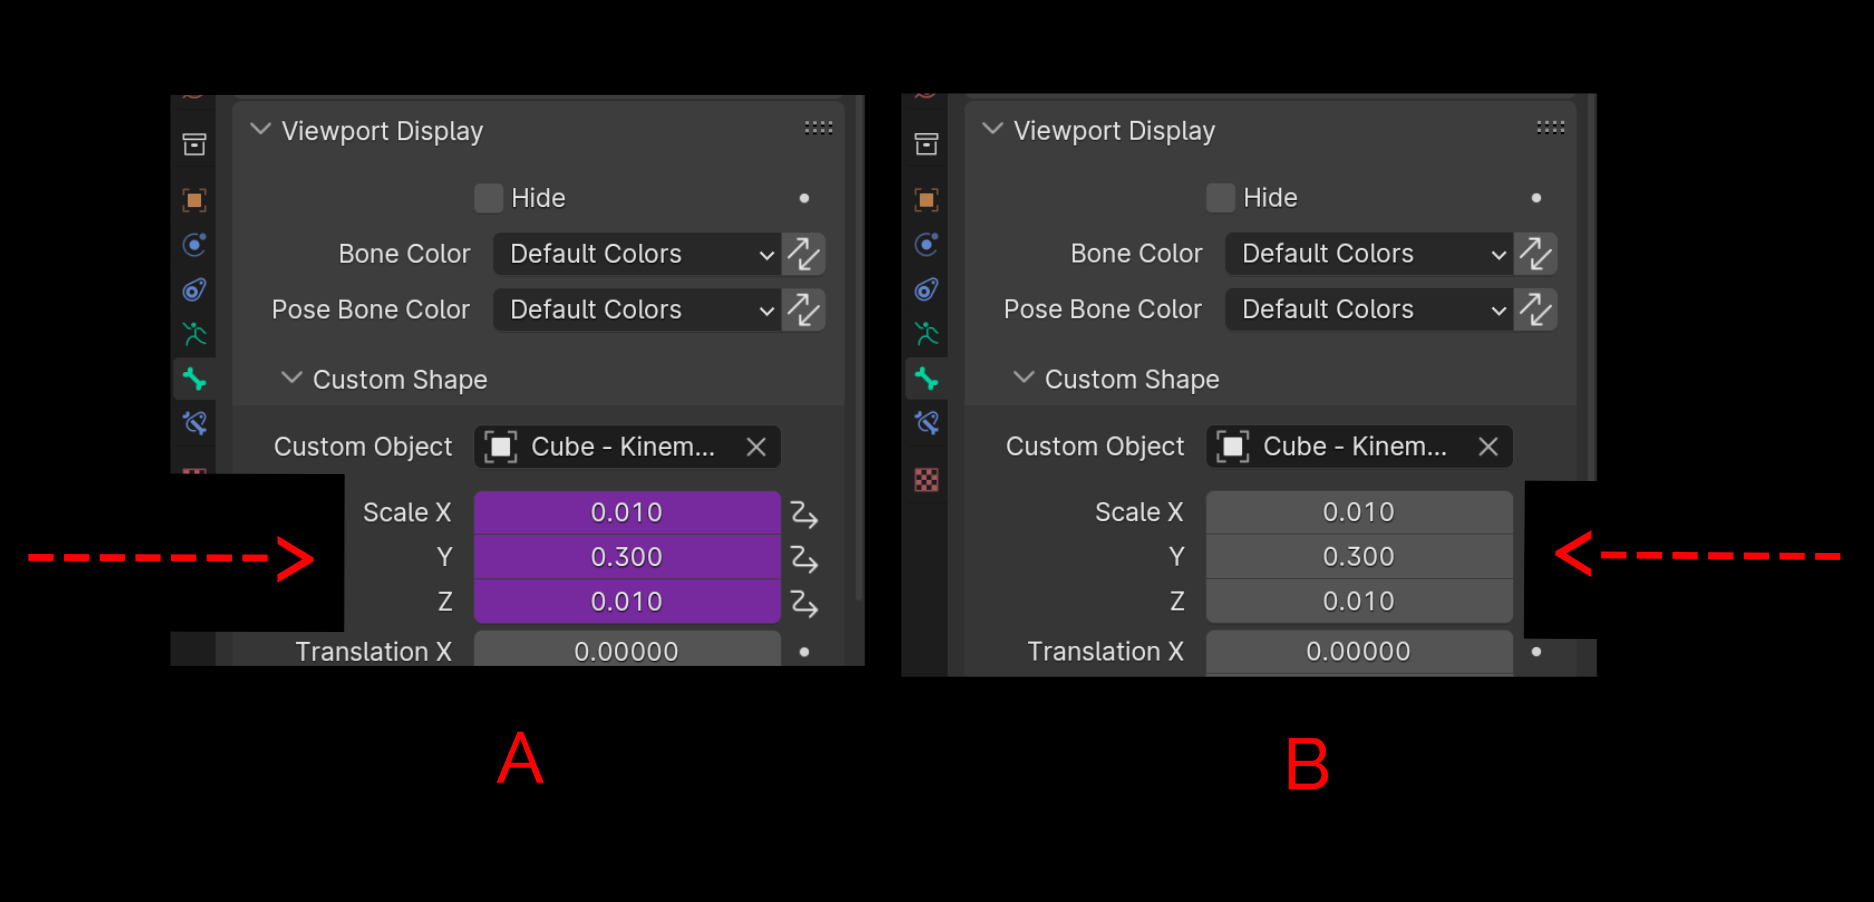
Each of the animation bones of the FK and IK chains of an assembled limb use custom shapes for their visual display. This isn't simply to make the viewport clean and pretty and to tell the IK chain apart from the FK chain, but rather to take advantage of an interesting visual trick. When the scales of custom shapes are set to 0, the bones "disappear". I say this in quotes because, unlike hiding a bone (with the "H" shortcut), the bones are still present in the viewport, but are "invisible" and unable to be directly selected.
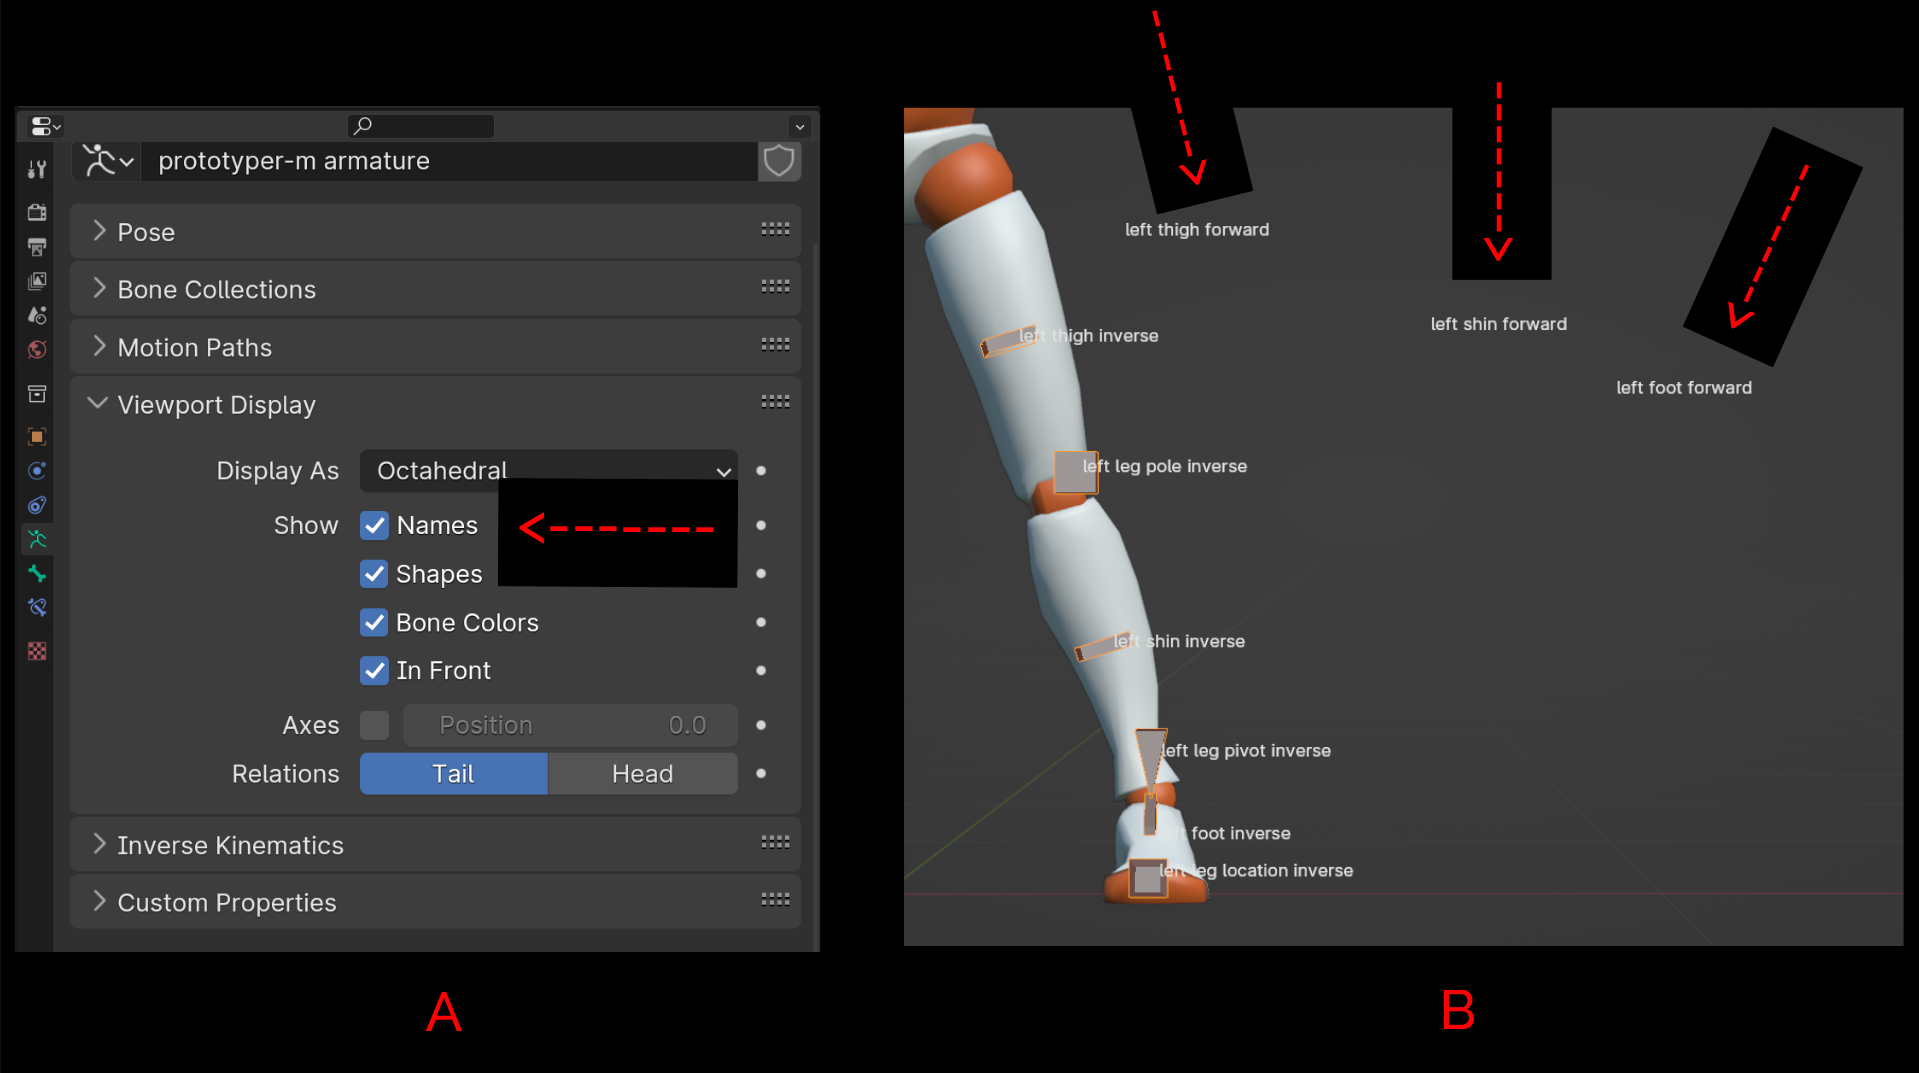
In fact, when the scales of a bone's custom shape are set to 0, you can still see the bone's name in the viewport (as long as you have Show "Names" turned on in the armature data's Viewport Settings). As well, the "invisible" bones will even be selected when all the bones are selected via "Select All" (shortcut "A").
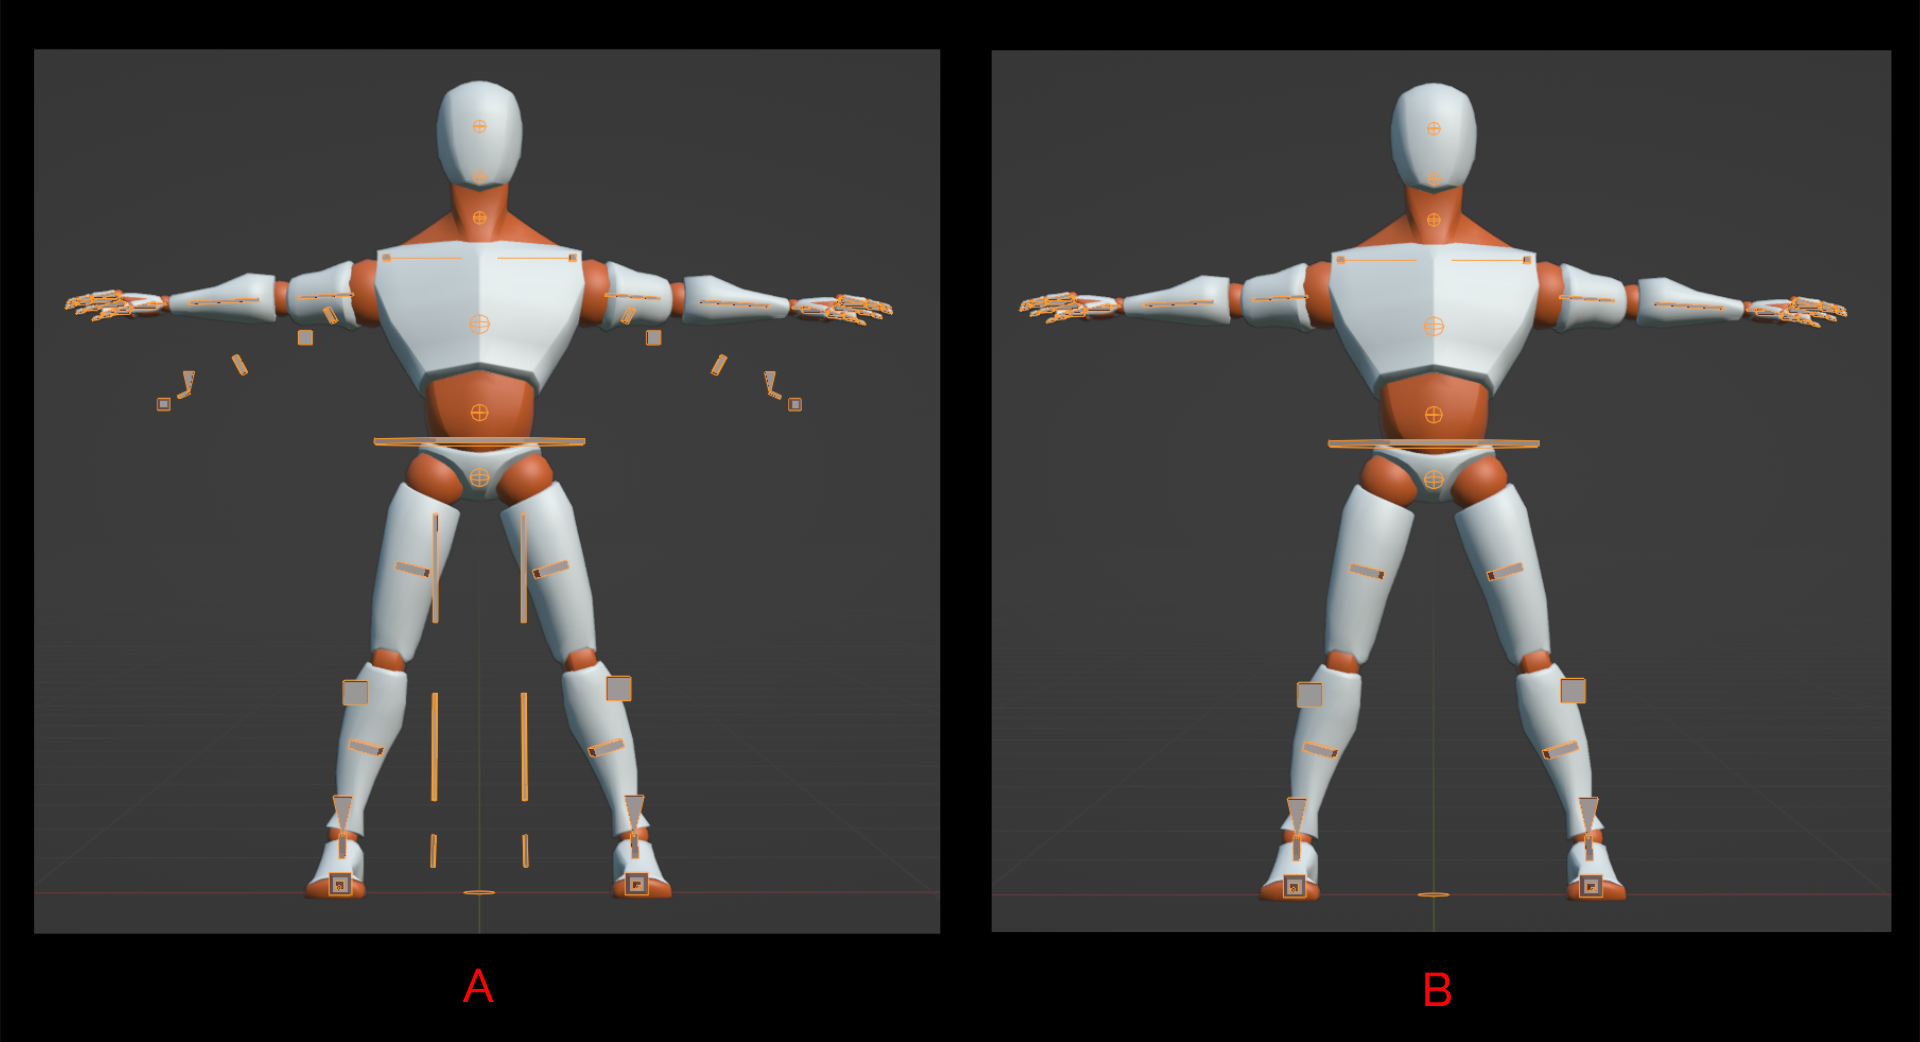
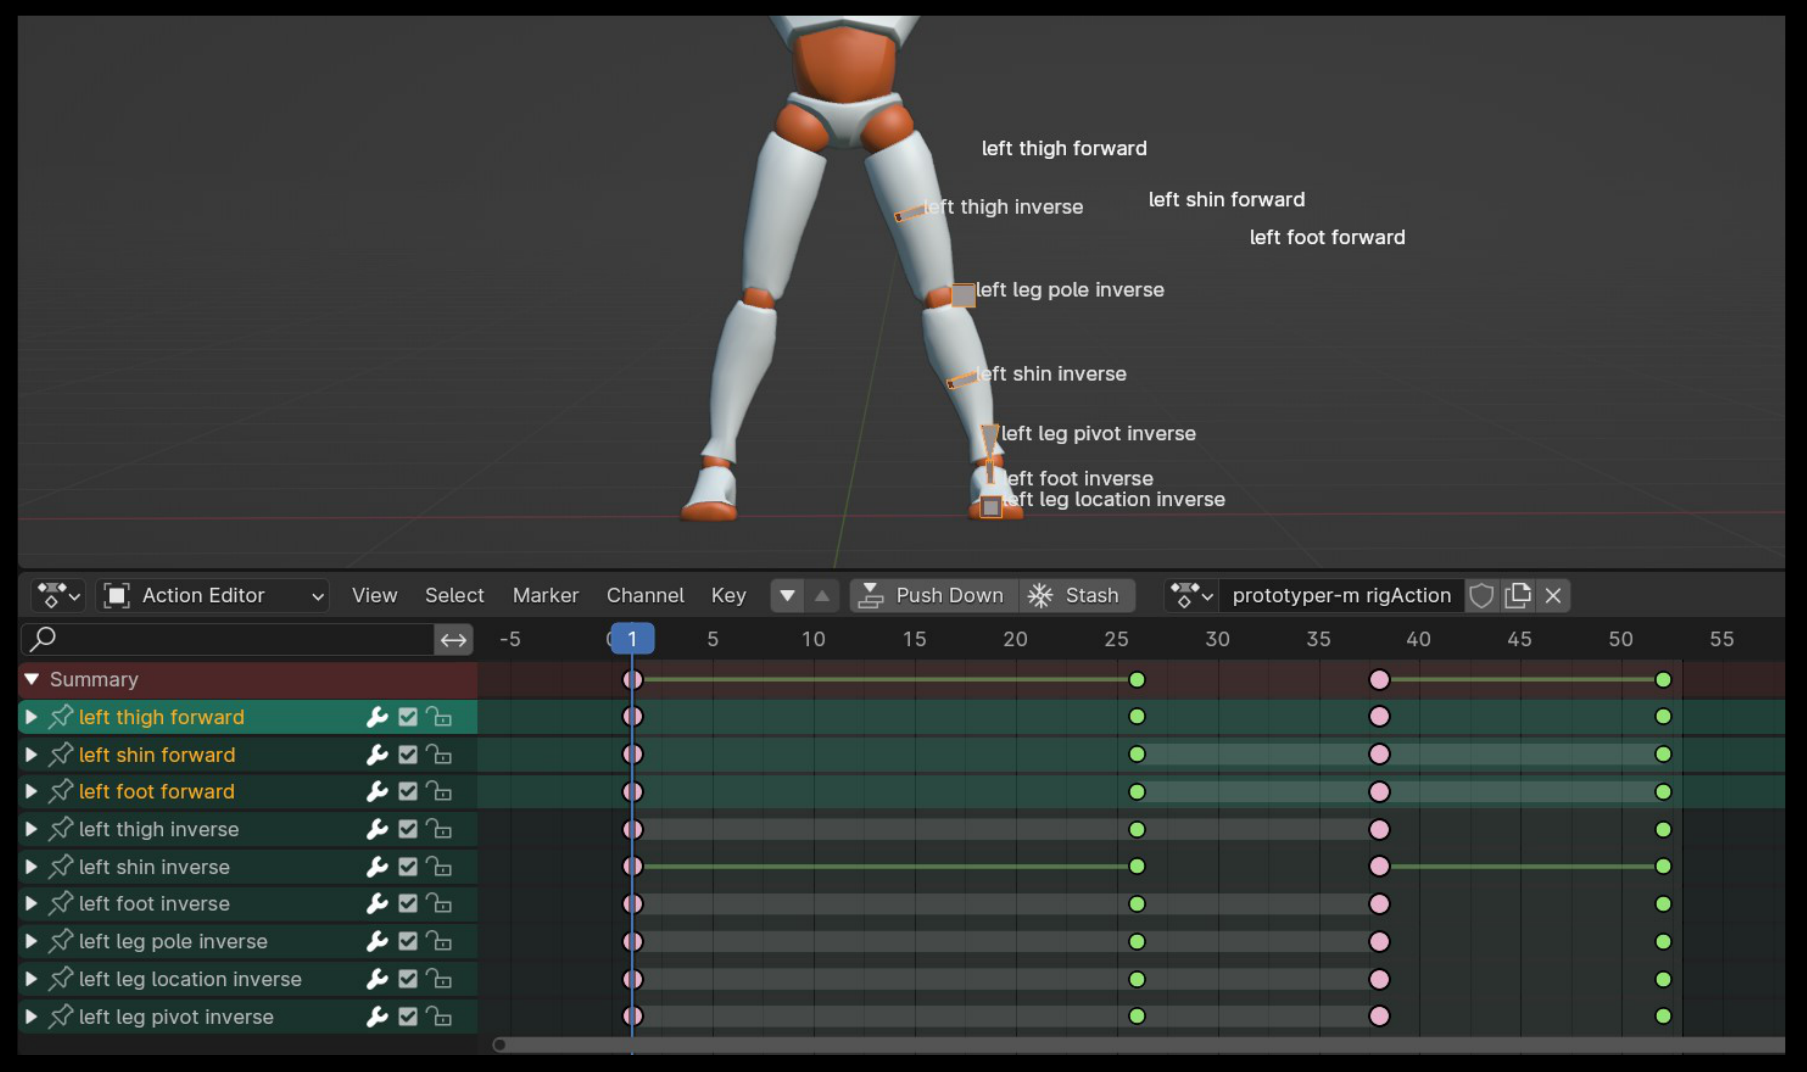
The first advantage this provides is that the inactive kinematic chains no longer become a source of visual clutter and confusion. When an inactive chain becomes the active chain, it turns visible, and the previously active chain that is now inactive becomes "invisible". With this system, you can easily recognize which chain is active and affecting the deformation of a mesh.
But making the bones "invisible" isn't even the best part about this system. Perhaps the greatest use of this trick is that by making a bone "invisible" (but not actually hidden), the animation data in the action editor won't be hidden and disappear, as is regular in Blender when hiding a bone. Instead, the animation data for an "invisible" bone just stays in the action editor. This further means that the keyframe columns that represent IK/FK switching can easily be group-selected and moved together. This is vital because keeping together the keyframe data of a switch within a single column helps keep the kinematic switches clean and tidy. Moving all the keyframes of a keyframe column would be difficult (if not downright frustrating) to do if some of the bones and their animation channels were actually hidden from the action editor.
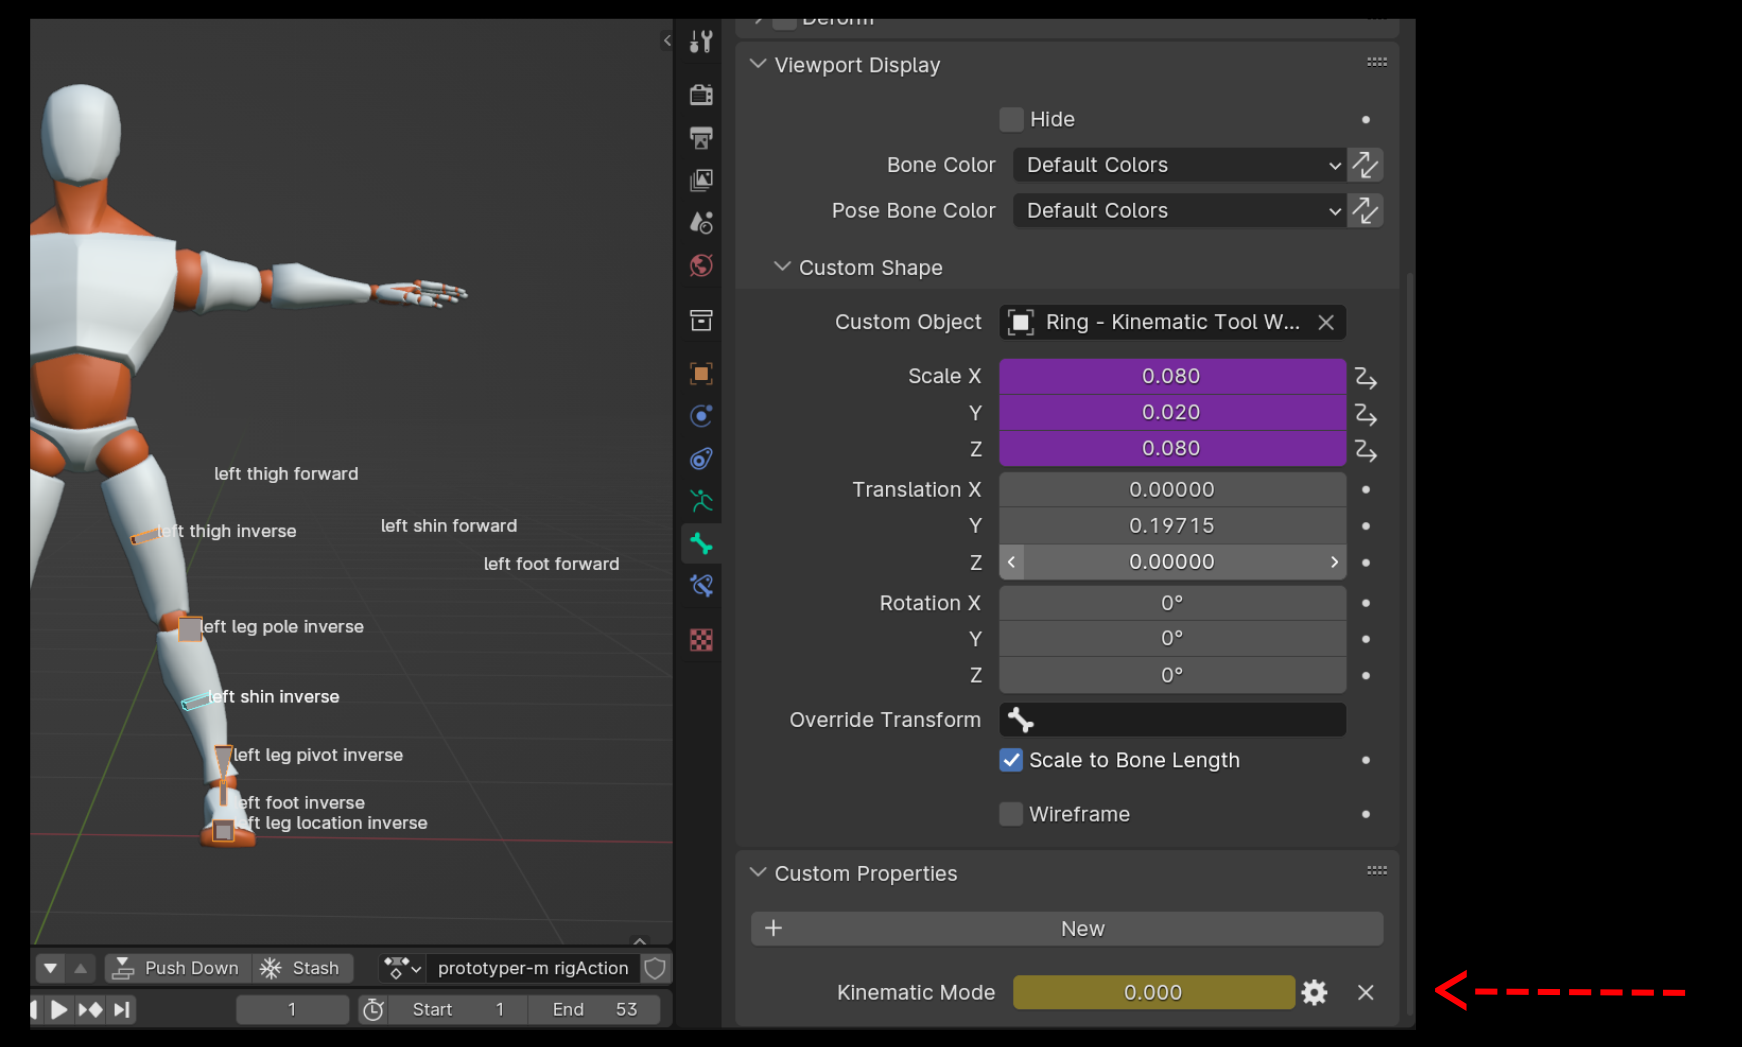
The property that drives the scales of the custom shapes and sets them to 0 when inactive and back to their normal value when active is the same "Kinematic Mode" property that controls the IK Ranges. So setting the starts and ends of IK ranges also controls the automatic visibility of the active and inactive kinematic chains. As you scrub across the timeline to edit your poses, the active chain is automatically displayed and the inactive chain automatically becomes "invisible" (but not hidden).
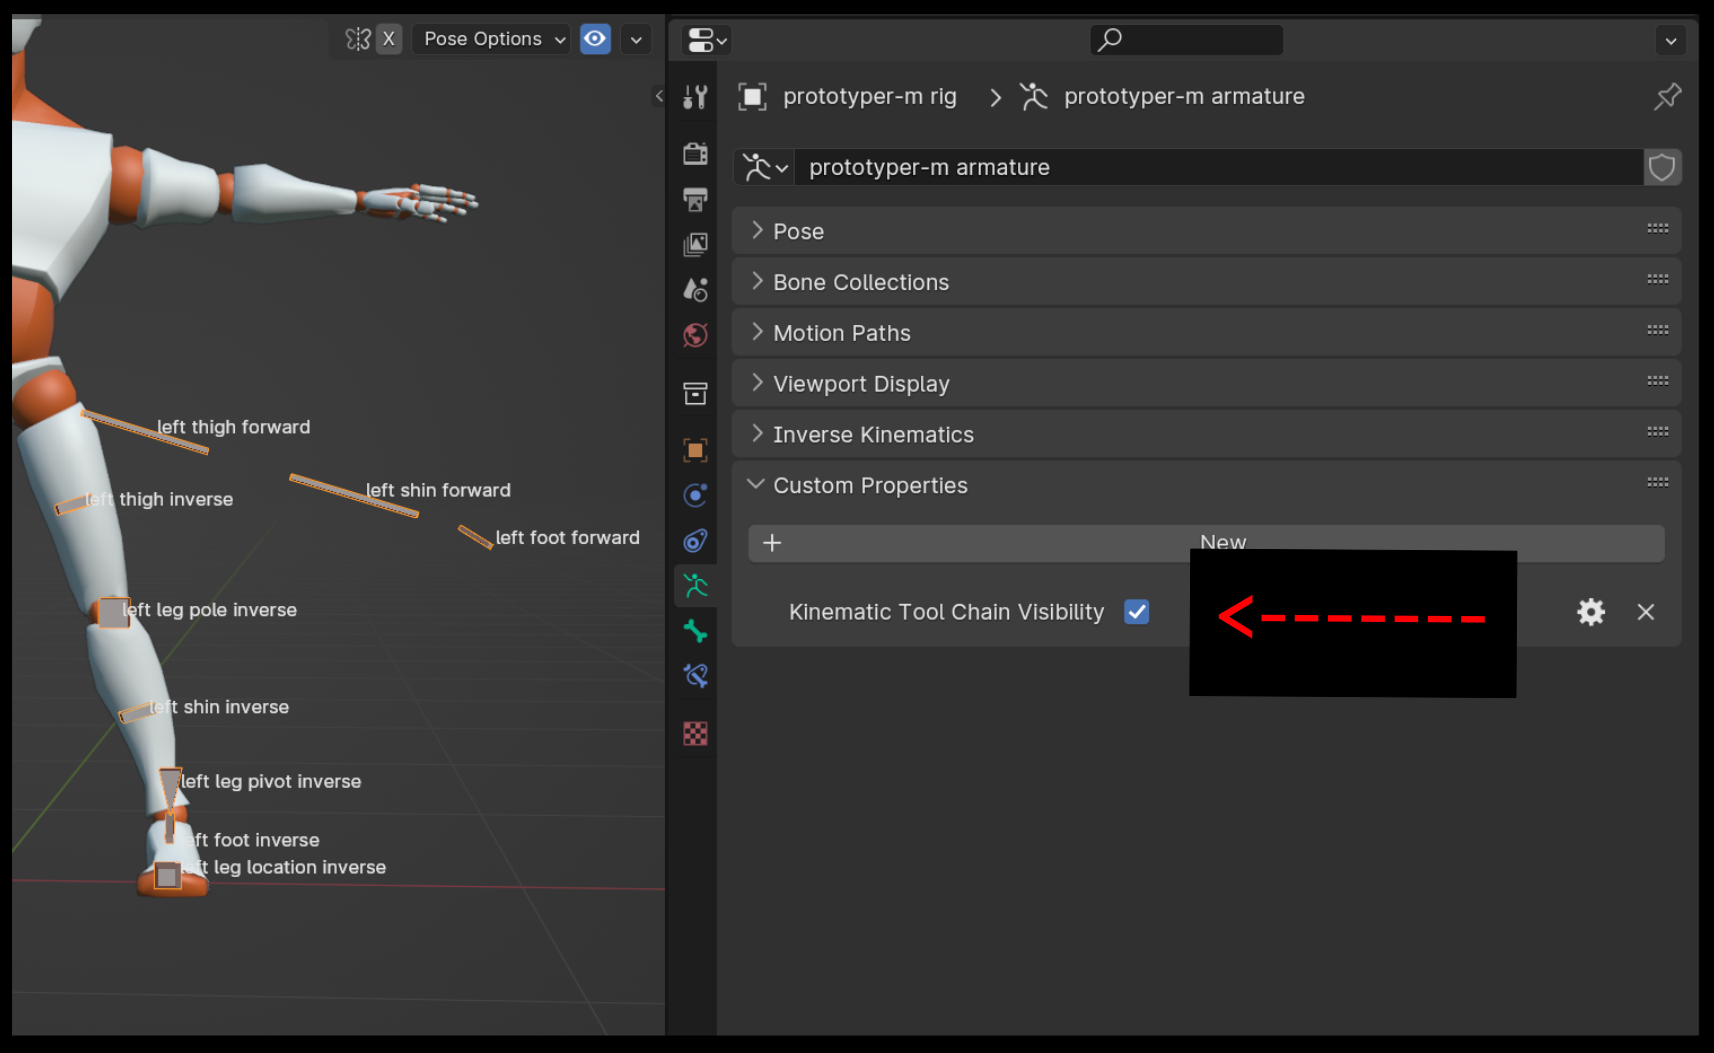
The custom property that allows you to toggle this visibility setting on and off lives on the armature, named "Kinematic Tool Chain Visibility". It's a Boolean property and if ever by accident you delete it and want to restore it, you can use the "Reset Constraints and Drivers" operator that's available at the bottom of the Kinematic Tool's right-click menu while in Pose mode.
Driving the scales on the custom shapes to do all this fancy stuff comes with a bit of a trade-off: it makes editing the values of custom shape scales rather difficult. Fortunately, the Kinematic Tool comes with some operators that help you make preferred adjustments and even reset the scales on the custom shapes to factory settings.
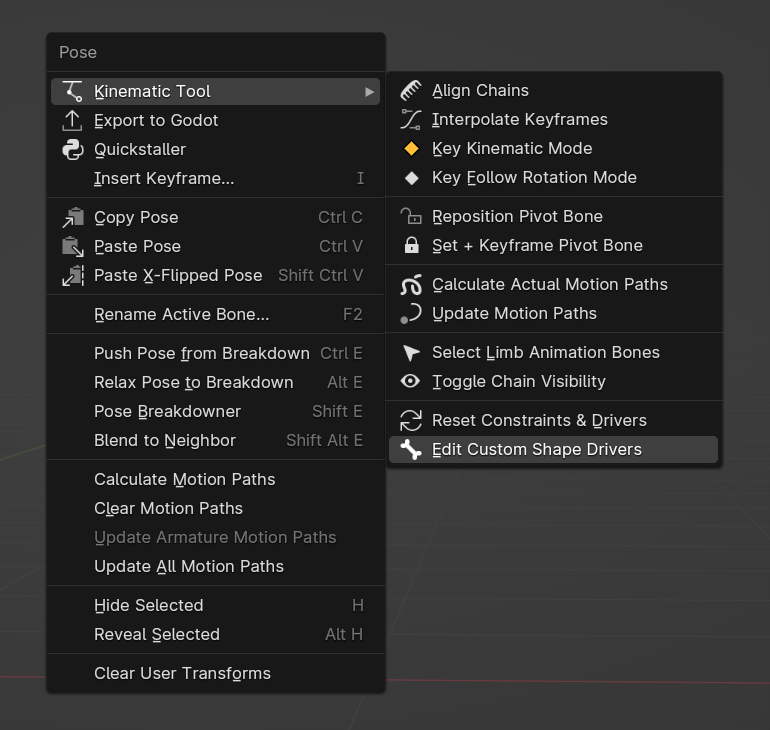
If you click the "Edit Custom Shape Drivers" operator inside the Kinematic Tool's right-click menu while in Pose mode, you'll find that the operator presents you with a few options to work with.
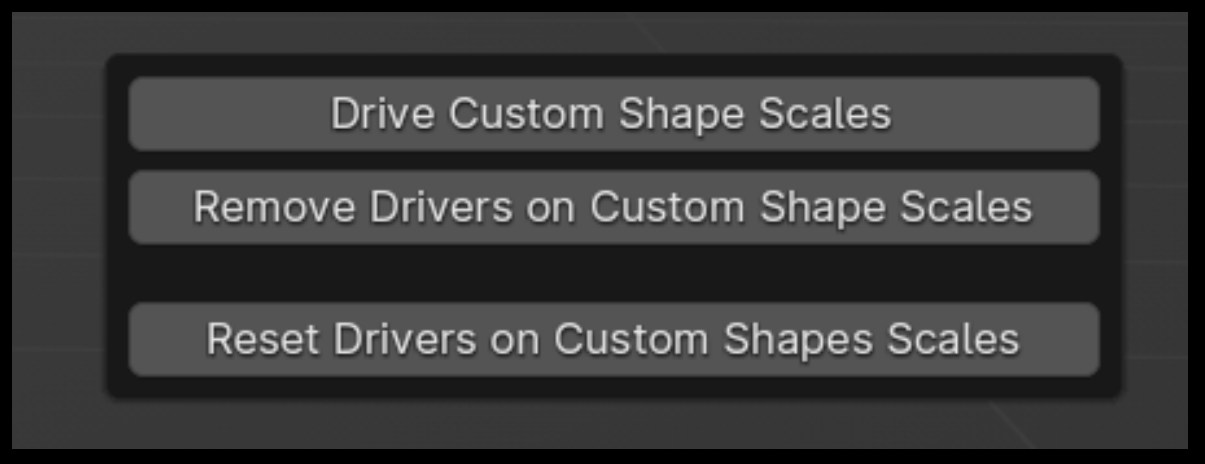
First of all, if you haven't made any preferable modifications to your custom shape scale, and you find the drivers on the custom shapes aren't working as you'd expect (usually as a result of trying to fiddle with the drivers), you can always use the "Reset Drivers on Custom Shape Scales" operator available inside the Kinematic Tool's right-click menu while in Pose mode, which will reset the drivers to their default settings (if they still aren't working as intended after using this operator, first try using the "Reset Constraints and Drivers" operator just above the "Edit Custom Shape Drivers" operator).
You can edit the scales of the custom shapes and mark their default values (the values that will be used when the bone is part of an active chain) through two steps:
First, use the "Remove Drivers on Custom Shape Scales" operator to remove the drivers on the custom shape scales for the selected bone, so you can make whatever visual adjustments you'd like to the custom shape.
Once you've done that, use the "Drive Custom Shape Scales" operator to create new drivers for the active bone using values of the scales that are currently present. The custom shape scales will then respond to any visibility toggling and scrubbing across IK ranges.
Next, let's take a look at Pivoting an IK chain.